
In second year at uni, part of the course was a digital workshop class once a week. We covered photoshop, illustrator and InDesign but this post will just cover my photoshop work as it was the most helpful and my stronger programme. This is more of a documentation for me so I can remember sills I learnt and go over techniques which I haven’t used in a while but may be useful in the future.
Going into 2nd year I hadn’t done any photoshop work and was a complete beginner. We started off easy and simple and the work was quite rough around the edges but was a good place to start. I began by importing a picture and taking away elements of it to get rid of any harsh edges, I use this in almost every bit of photoshop work I do and although simple it makes a huge difference but you can go too far with it and it can ruin the image. I then inserted another picture and transformed it to get the right perspective and angles so it sat better within the first scene. I added a shadow to stop the object look like it was floating using the pen and rubber tools with the marquee tool and this is again a technique I use quite often.
")
")

The second week we worked on grounding the backdrop better and making it look better on the page and with the added object and people. By adding lines I extended the background and gave the idea of the rooms size and brought it out onto the page more. I worked more with objects and their shape in relation to the surroundings. This could have done with more work but it isn’t too bad for the second week. I think you get the idea of what the object will look like in situ and that is the purpose. By adding the person in it shows the scale of the object and background and adds a movement to the image and makes the picture more dynamic. I worked a lot on shadows this week and how to create multiple shadows that looked more realistic and consider how they fit into the background shadows as well.

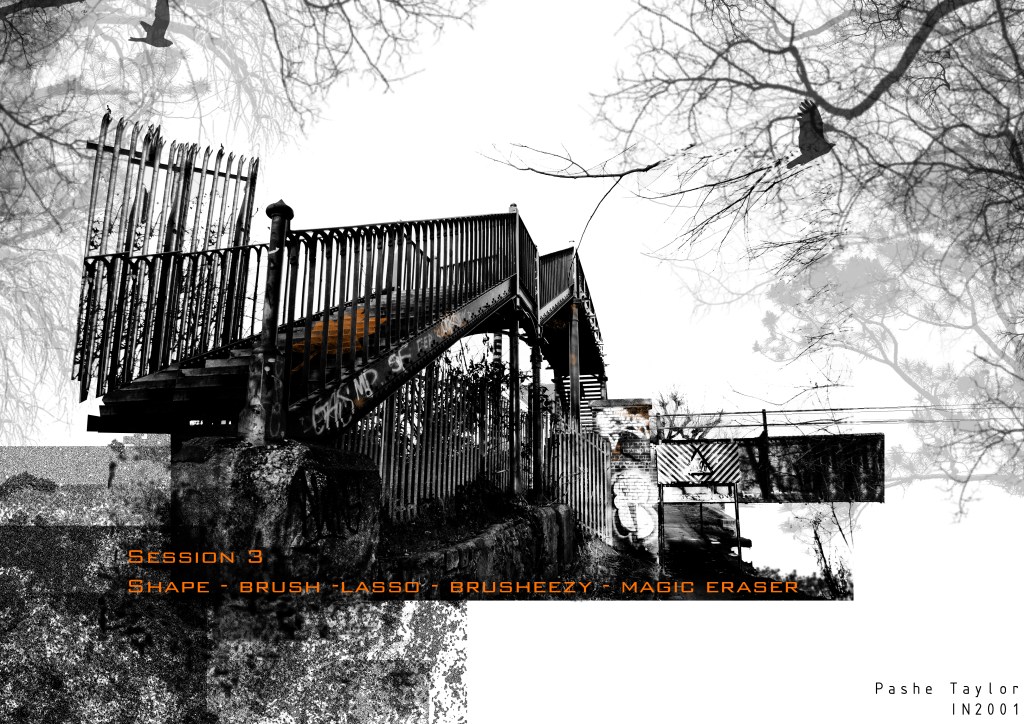
In week threes workshop I think I produces some of my best work. We had to take an image and add more background for depth and incorporate a shape onto the stairs. It was a long process but the results was great and I learned a lot of new techniques. Adding the background trees and birds created depth and put into more context which I use often today in my CAD and SketchUp visuals that I take into Photoshop. It really makes the image and means I have more space to play with as I can extend the scene. doing the shape through the bars and the small bits of graffiti in colour was quite difficult t as it had to be fairly realistic and it showed me that if i do want to add this kind of detail at a later stage I can do. I think the different opacities, sizes and colours I used enhance the image and works well as a visual.


Week 4 wasn’t my favourite in terms of the outcome I produced but I did learn a lot of skills and techniques which have helped in future projects. The idea of this session was to create flags that looked like they were being blown in the wind. Although basic, I think the image works to give an idea of how it would look in real life and distorting the shapes to create movement and become 3D has helped massively.

One of the most useful workshops was number 5 when we started to use the stamp clone tool. I learnt how to remove objects such as bollards and also people in a picture using the stamp clone tool and lasso tool. This technique is great if I want to use a background image of an area and remove parts to put my own design in which is a possibility for my honours project site. I’m really impressed with this outcome and although quite time consuming it wasn’t too difficult to create the final image.

The next piece of work was from week 6 not 5 as the image says and this one is one I am possibly most proud of as it turned out much better than I expected and it took a lot of time to get it to look how I wanted. This was created using very few tools and made me really comfortable with the brush and pencil tool as I found out different ways to use it and the effects they can give. I jut wish I had put a shadow and more of a background on the image but I am pleased with it anyway.

Session 7 was creating panoramic landscapes without having taken a panoramic picture. You get a less distorted image and can create better visual effects and a more dynamic picture.It was difficult to line up the pictures and get the colours to match and look seamless at the edges, it isn’t exact but it looks good and not distorted.


In one of the last sessions, we explored how to edit pictures and put effects onto them. I haven’t found much use for these skills as of yet but I think with my final projects approaching they will become useful.


The final week of the photoshop workshops worked on presentation boards and how to lay out work and apply effects to text to make it stand out and match the style of the project. This was a helpful session and I use these techniques in most of my projects.

After these workshops I did some more work on photoshop, turning empty spaces into residential and commercial rooms and different effects onto pictures. I really enjoy working with photoshop and it is definitely one of my stronger programmes.


Leave a comment